Tuesday 16 July 2013

Facebook Shop!

Hi guys! we are now selling all our items on our Facebook shop! check out our icon for our store and have a look!!

Like our page and click on the store icon! if you want something more personalised just message us!


For every blanket we sell we will also send you a lovely key ring! Great for stocking fillers at Christmas! YES I KNOW! its only July!! but no harm in getting bits early!! and free aswell! :-)


xx -  leave us some comments! GOOD OR BAD!

Friday 12 July 2013

Personalised Blankets on the GO!

Ok....well some may know, Mummy Sharon was made redundant a few weeks ago and has now taking on MiniMix full time! So its all system's go! Check our her great imagination and personlised items she laid out!

Sorry not the greatest of pics lol! But i'm sure you get  the gist!


Thursday 11 July 2013

Make your own Key Ring: MiniMix Style

Hi everyone.....

Well i got around to making a tutorial finally ha!! Doing craft fairs made me realise i needed to make some other small bits to sell on our stand so used some of the buttons i had and made a key ring! I think they are too cute! Here's a step by step guide on how to make these key rings!


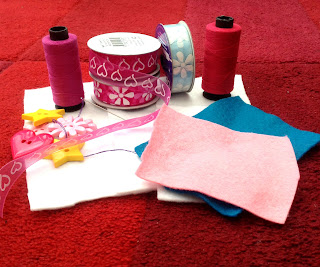
Step 1: Right you need to start with your materials: Felt, Sewing Needle, Cotton, Scissors, Ribbon, Key ring Link and off course the main ingredient a Button.


Step 2: Place your button onto the selected colored felt, leaving a few cm around the edge. Thread your selected color cotton through the eye of your needle, double up on the thread and knot where the ends meet. Be sure the cotton is off good length as you will not be cutting the cotton once the button is attached, this will be used to sew the shape onto another piece of felt. 


Step 3: Attach your button and secure a knot with your cotton at the back of the felt: Be sure not to cut your cotton just yet


Step 4: Cut a shape around your sewn in button, be sure to leave about 1/2cm edge: (in this case i'm cutting a heart shape)


Step 5: Place your shape onto another piece of felt and push the needle through the colored cotton from the back.


Step 6: create a simple link stitch around the edge of your shape attaching the piece of felt at the back.


Step 7: Once you have complete the stitching cut , tie a knot in the back securing your stitching. 


Step 8: Then cut around the back piece of felt in the shape you desire.


Step 9: Place your heart onto another piece of felt (i'm using white again but you can have what ever color you fancy) and cut the shape again.


You should now have two pieces to put together


Step 10: Cut a piece of Ribbon for your loop, measuring about 5-6cm.


Step 11: Piece your key ring together, thread a your cotton again through the eye of your needle, again please double up and double knot where the ends meet. Place the knotted end of your thread sandwiched in in the two pieces of your key ring.


Step 12: Again from the inside of your sandwich start your simple link stitch ensuring the stitch is tight and taunt.


Step 13: Stitch all round the shape of your key ring and you should end up with something looking along these lines! DO NOT CUT THE THREAD 


Step 14: now this bit is a little tricky if you are new to sewing.....Turn the key ring over so the back is facing you. Push the needle between the layers of felt.....Pull the thread through and leave a little loop for you to post your needle through to create a knot. 


Step 15: Repeat steps 13 and 14 a couple of times ensuring the knots are tight, then cut the thread as close to the felt as possible. 

And you should have something like this!


Step 16: WOW last step, nearly there whooooo hoooo!! ATTACH YOUR KEY RING LINK!


And there we have it, a gorgeous hand made key ring! something different and personal and made by you....

These are great for little stocking fillers at Christmas (ok i know its JULY but better being prepared then rushing at the time) great for making little presents to include in cards for those birthdays that don't warrant a present but you want to make a little special, or just as part of a special occasion pack....for those who have everything and brain racking hard to buy for! ha! 

All the materials can be brought from any good hobby shop.....But if you want to save the hassle of sourcing the materials needed then we are selling these MiniMix Maker Key Rings on our website and Facebook Shop: Links Below. We are providing the materials needed including the buttons to make THREE KEY RINGS for only £7.00 including a print out of this tutorial! All you need to have is a needle and Scissors.... 

MiniMix Facebook Page - please like, Share and click on our shop icon.


So whether you buy our pack or chose to make your's from scratch 
happy sewing!!


Wednesday 10 July 2013

Pension Reforms!! The internal mind baffling battle!!

Pension Reforms!! The internal mind baffling battle!!

Ok I know this is nothing to do with crafting or our items but seriously need help!!!!! My employer has just been to a seminar about the pension reforms!! I know it’s not until a year or so but STILL!!

Right, single working mummies WHAT ARE WE GOING TO DO????? I think we have to pay in 8% minimum into the pension thing which our employees have to automatically op us in!! And we have to call up the pension people to opt out!!

On my estimations that’s going to be a chunk of my wage which I JUST CAN NOT AFFORD and the difference between buying my growing strapping cheeky boy new clothes and shoes, (I do like my Alfie to look nice in clothes and shoes that fit, I buy most of his bits from Primark, might be cheaper than next but don’t last long AT ALL) skimping on certain foods (more than what we have to budget for at the moment and I shop at Aldi, no shame in that) and just generally cutting back more than what we have to at the moment, visiting family and friends, buying the odd bottle of wine! Mummies, please tell me you don’t need a bottle of wine at the end of the week!!! I’m gutted! With the cost of living increasing, petrol, child care being so high WHAT ARE WE GOING TO DO?????

On one hand I want to pay in because I’m thinking long term, with my sensible head on, when I’m old and grey! Yes the grey is already starting and IM ONLY 25 and now officially closer to 26! Where have the years gone….oh yeah sleep deprived and working……sorry back on subject……but on the other hand how can we afford to do it now!! 

Growing a business is hard enough and every penny we earn is going back into the business at the moment L my dreams of an Audi A4 has dashed out the window, skidded on to a corner, crashed burned out into the a tree and to top it off into a river!!

Am I being selfish wanting the nice things in life which I work god dam hard for!? I remember the days I use to go to work and earn enough money to buy the bits I needed and want and still put some in savings! NOW ITS weekly shops at Aldi (can’t knock the food sold there) hand me downs from family and friends and not being able to spoil my little man is heart breaking!! I dread the sound of the ice cream man! We keep the population going with our children, some like to stay at home (good on ya as really don’t know how you can do it, my little monster drives me nuts and if I could stay home with him all day I WOULD) but I chose to go to work and now I’m penalised left right and center for it!


Any thoughts would be grrrrrreat as Tony the tiger would put it!! Ha! 

OMG MY HAIR!

Ok, for those of you who don;'t know me! I've had mega long hair for a very long time , down nearly to my bum! and really don't like hair dressers! (trust me an awful experience with a Spanish hair dresser, ok she was English and dyed my fell's hair at the time light buld yellow! OK MAYBE SHOULDN'T OF LET HER TOUCH MY HAIR READING THIS ha) but anyway, she cut my hair (a few years ago now) and basically she said at the end "OH IT'S MEANT TO LOOK LIKE HAIR EXTENSIONS!"

WHAT! no! my hair was all one length and i just wanted layers! GOD IT WAS AWFUL! so basically i don't like people cutting my hair!

But unfortunately it had gone sooo long without a cut and was just a tangled mess i looked like a hobo dread lock fruit loop....couldn't brush it properly and had to get my mummy to brush my hair at times! I'M 25!!!!!! plus the amount of shampoo and conditioner! wow! no wonder i was always cursing when paying for my shopping and weekly cosmetic products!

So basically i decided to have it cut! what started as a trim turned into 5 inchs of the length and do you know what I LOVE IT! it feels awesome, fresh and bouncy. I have really thick hair so it was awesome to feel some weight being taken off.....! but here's the mess i left behind ha!


I took the bag of hair home (yes i know, whack job) and told my fella well we have a enough hair now for him to get plugs! ha.....yep he wasn't too impressed.....(he's losing his hair, touchy subject he he but i secretly laugh ha ha ha ha! )

So thank you to my lovely wonder hair dresser, Lisa @ talking heads in Northampton! I LOVE MY NEW LOOK!

xx


Tuesday 9 July 2013

Key Rings

New Keyrings!

Hmmmm well we was thinking….We’ve started to do more craft shows and wanted to make some new items to sell as bits and bobs on our stall! So we’ve made some key rings!


What do you think??


Just waiting on the metal circles now! Might even give these away with every order...We are going to be charging £2.50 each! 

Love MiniMix xx


Monday 17 June 2013

New Item Alert! Buggy Cosys!


JUNE 2013
OK my mother is amazing! Look what she has created…..just amazing! Our new range of buggy cosys are going to be sold on our website for £45.00 plus P&P which I think is a fab price….my buggy cosy (the fleece tie up one) cost me £30.00 from a high street shop! So £45.00 for an irreversible buggy cosy, including zip and a Velcro strapping system for ease of attachment is a bloody steal!


Basically our buggy cosy’s are made from one side: cotton / the other side: Fleece – so to keep snug and warm in the winter and cool in the summer! The bottom (which is attached to the seat) has wadding inside for soft little bottoms to sit on! A good sized pocket on the cotton side of the cover which is big enough for bottles / beakers and best of all those ever going missing dummies! I don’t know about you but when I’m out and about I get soooo annoyed with having to stop every 5 minutes to give my son his beaker and then the juice spills into the cosy and its just a night mare!
The way the zip is sewn in means the actual cosy can be reversed when one side is dirty! And you have it whichever way you would like it!  We’ve also but a Velcro strap on at the top to hold in place on the bars of the pram! So no fiddling tying and untying the knots! Which I think it great, just unstraps it when I want to wash it!
Check it out on our website:


More designs coming soon!

Please leave us your comments on our new product as we really want to know what you think – good and bad! It doesn’t matter! :-) xx